As a photographer, with modern cameras, one may believe that it is very rare to fail to expose properly an image. Well, whereas this is true for most images, there are still so many cases where it is not that exceptional. Let me give you a few examples:
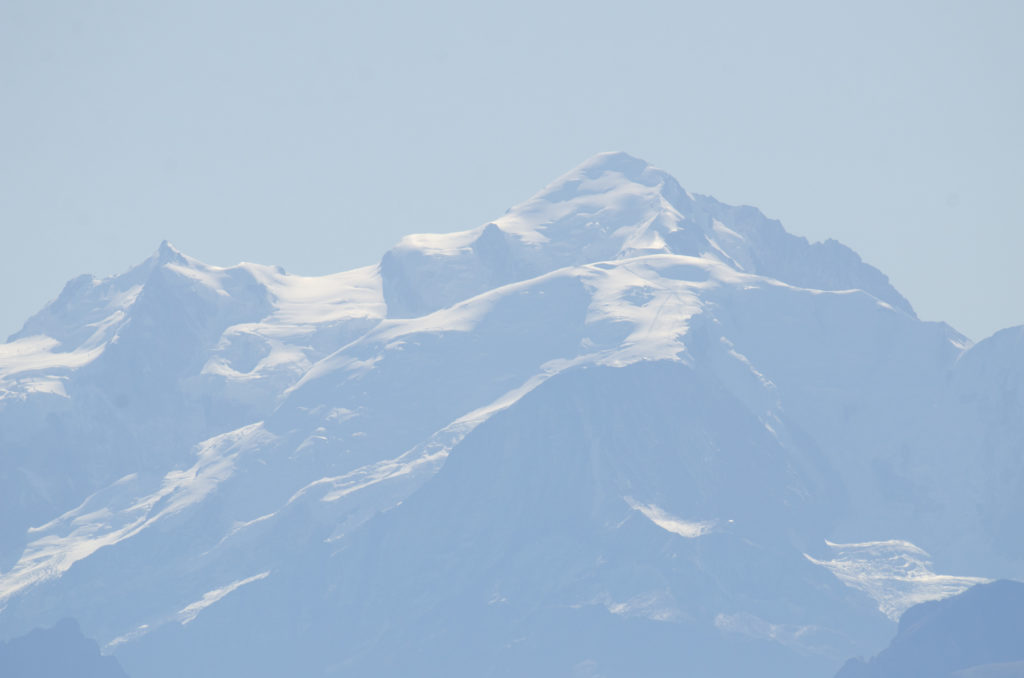
Example 1: Mont Blanc - Long Range shot with haze
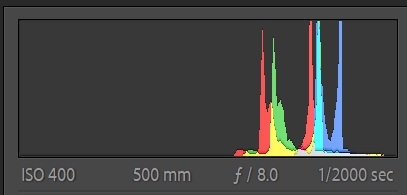
Mont Blanc shot with a Nikon DSLR + Tele lens, Program A. The matrix system of Nikon made a mistake that I did not detect but the image is over exposed, significantly. Due to some haze, the low contrast is making the post-processing very challenging, and the result is disappointing.
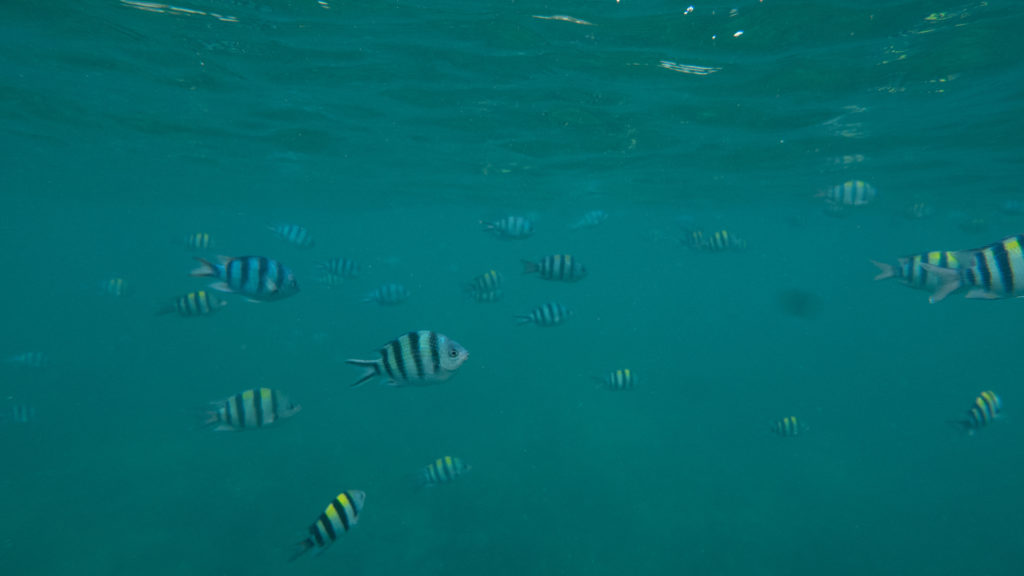
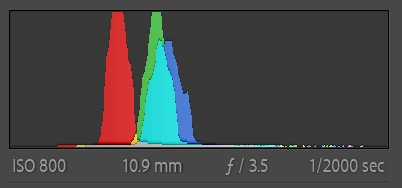
Example 2 : Underwater
Underwater images can be challenging for the measuring system. Panasonic’s one was fooled, under exposing the image. The camera’s sensor is old (LX 100) and at 800 ISO, noise is too high when an exposure correction is needed not to impact the final quality of the images shot during this underwater shoot.
Remarks about an exposure wrongly set-up
In both cases above, in the introduction, if you always shoot the same kind of images, you will learn from your mistakes of course and you won’t miss the exposure, eventually. But as soon as you get out of your comfort zone and try new things, that’s a different story.
Finally, when I am culling images after a shoot, I am facing two challenges when it comes to exposure: one which looks trivial (detect the very poorly exposed images) and one which is tricky: flag images that are not so well exposed, still usable but below the quality level I can deliver. So that I can improve. And even if the first issue (detect poorly exposed images) is easy, it can be tedious to cull them. And culling is boring anyway. That’s why this rule has been implemented in the software Futura Photo, which goals are to facilitate the culling process and other steps needed before the post-processing.
When it comes to exposure, I like to write there are 2 different issues:
Clipping and burning
Overall exposure of the image
“Clipping and burning” means missing to expose properly some parts of the images whereas it was possible. I have already detailed this problem in a previous post and this rule is also implemented into Futura Photo for the same reason.
Overall exposure is a different problem: you can have missed to expose as needed the image without burning or clipping (again in a significant way) your photo. Let’s have a look at the next image:
Whereas the image itself is globally overexposed, the subject, a dragonfly, is really underexposed. But no part is burnt or clipped.
More interesting, there are actually different ways to miss this global exposure… Let’s now discuss this.
Different kinds of badly exposed images
Let’s group them in 3 main groups:
Case 1: Just poor exposure : very over or under exposed
Case 2: No midtone
Case 3: Low contrast and images poorly exposed (over or under)
Below an example for each group:
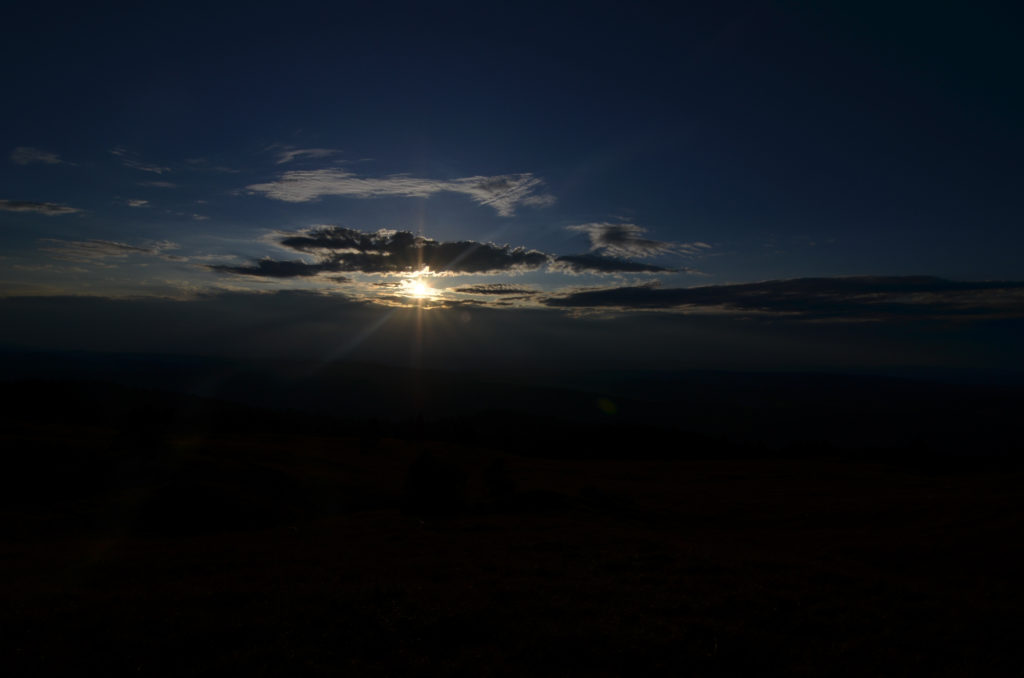
Case 1 example : I wanted to avoid too much burnt parts around the sun, but I went too far, and the image is underexposed.
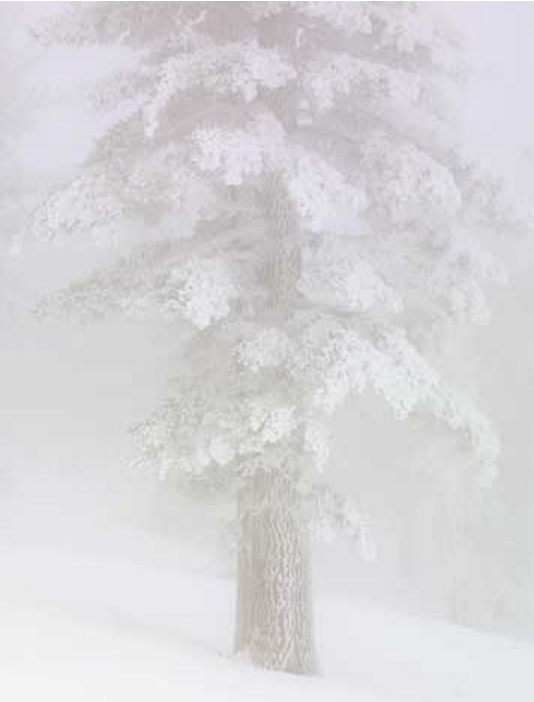
Case 2: no midtone. The tree is over exposed. We should have some low keys.
Case 3: low contrast. Image overexposed.
The root causes of each category are quite different from each other.
Case 1 is easy to fix… whatever the root cause could be (Manual Mode badly set up, camera measurement system fooled, not enough light).
Case 2 can mean “buy a better gear” capable to have a bigger dynamic range, shoot raw (if not yet the case), or come back with a better light (as image is too much contrasted), or bracket. Or all of that.
Case 3 can fool even experienced photograph. For low contrast images, don’t hesitate to bracket. In the above example of case 2, it is too a low contrast image too. Of course, the tricky scenario can be a mix of the 3 different cases.
Why it matters
Even when shooting RAW, sky is not the limit. A failure to define the right exposure means less contrast in your image and degraded result. For some images shot with cameras benefiting from high dynamic range, this can be perfectly acceptable, and the consumed JPG will look perfect. But not for all, far from that.
When you have missed to expose as you should have, you just can’t do what you want during the post-processing, but just what you can, from such an image, and you may very well fail to express something artistic like you have wished. Yes, it is not a detail. Either for lack of rigour or being too much complacent, we, photographers, tend to underestimate the lack of quality of our images. It is good to remember that, detect what went wrong and improve.